First programs in xtd.forms
In this chapter, we will cover the basics needed to create xtd.forms applications. We will create our first simple example, show how to display an icon. Next we will create a simple example demonstrating usage of an event. Finally, we will see how controls communicate in xtd.forms applications.
A simple application
First we create the very basic xtd.forms program.
#include <xtd/xtd>

namespace tutorial {
  class simple : public xtd::forms::form {
  public:
    simple() {
      text("Simple");
      start_position(xtd::forms::form_start_position::center_screen);
    }

    static auto main() {
      xtd::forms::application::run(simple {});
    }
  };
}

startup_(tutorial::simple::main);
This very basic example shows a small xtd::forms::form on the screen. The xtd::forms::form is centered.
start_position(xtd::forms::form_start_position::center_screen);
The method start_position centers the xtd::forms::form on the screen, both horizontally and vertically.
startup_(tutorial::simple::main);
The code behind startup_ macro can be replaced by :
auto main() -> int {
  return xtd::startup::safe_run(tutorial::simple::main);
}
The xtd::startup::safe_run method can be replaced by :
auto main() -> int {
  try {
    tutorial::simple::main();
    return xtd::environment::exit_code();
  } catch (const std::exception& e) {
    xtd::forms::exception_box::show(e);
    return EXIT_FAILURE;
  } catch (...) {
    xtd::forms::exception_box::show();
    return EXIT_FAILURE;
  }
}
This example can be build on Windows, macOS or linux operating system with CMake.
cmake_minimum_required(VERSION 3.20)

project(simple)
find_package(xtd REQUIRED)
add_sources(src/simple.cpp)
target_type(GUI_APPLICATION)
See CMake for more information.
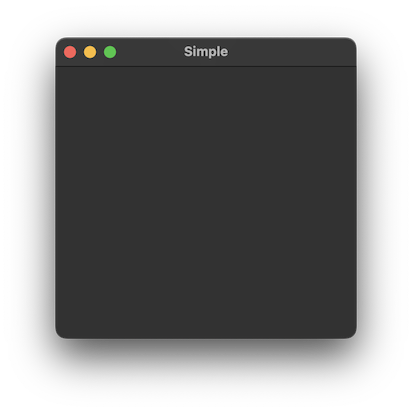
Figure: simple
Application icon
In this example, we provide an icon for our application. It became a standard to display a small icon in the upper left corner of the form. The icon is a graphical identity of the program.
#include <xtd/xtd>

namespace tutorial {
  class form_icon : public xtd::forms::form {
  public:
    form_icon() {
      text("Icon");
      start_position(xtd::forms::form_start_position::center_screen);
      icon(xtd::drawing::system_icons::gammasoft());
    }

    static auto main() {
      xtd::forms::application::run(form_icon {});
    }
  };
}

startup_(tutorial::form_icon::main);
In our example we show a small gammasoft icon.
icon(xtd::drawing::system_icons::gammasoft());
To display an application icon is a matter of one code line.

Figure: icon
A simple button
In the following example, we create a button on the form control. We will show, how to create a simple event handler.
#include <xtd/xtd>

namespace tutorial {
  class form_button : public xtd::forms::form {
  public:
    form_button() {
      text("Button");
      start_position(xtd::forms::form_start_position::center_screen);
      active_control(button_quit);

      button_quit.parent(*this);
      button_quit.image(xtd::forms::images::from_name("application-exit", xtd::drawing::size {16, 16}));
      button_quit.image_align(xtd::forms::content_alignment::middle_left);
      button_quit.text("&Quit");
      button_quit.location(xtd::drawing::point {20, 20});
      button_quit.click += xtd::event_handler {*this, &form_button::on_quit};
    }

    static auto main() {
      xtd::forms::application::run(form_button());
    }

  private:
    void on_quit(xtd::object& sender, const xtd::event_args& e) {
      close();
    }

    xtd::forms::button button_quit;
  };
}

startup_(tutorial::form_button::main);
xtd::forms::button button_quit;
First we create a button control.
button_quit.parent(*this);
button_quit.image(xtd::forms::images::from_name("application-exit", xtd::drawing::size {16, 16}));
button_quit.image_align(xtd::forms::content_alignment::middle_left);
button_quit.text("&Quit");
button_quit.location(xtd::drawing::point {20, 20});
It will be placed inside a form control. It will cause to display a small operating system dependent exit icon on the button. The text of the button is Quit. The button is positioned manually at left=20, top=20 coordinates. The beginning of the coordinate system is at the upper left hand corner.
button_quit.click += xtd::event_handler {*this, &form_button::on_quit};
If we click on the button, a click event is generated. We connect the event to the on_quit() method of the button class. So when we click on the button, the on_quit()` method is called.
active_control(button_quit);
We set the keyboard focus to the button. So if we press the Enter key, the button is being clicked.
close();
Inside the on_quit() method, we call the close() method. This will close the form and terminate our application.
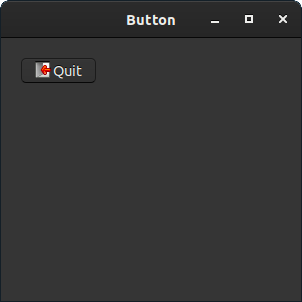
Figure: button
Controls communicate
It is important to know, how controls can communicate in application. Follow the next example.
#include <xtd/xtd>

namespace tutorial {
  class panel_right : public xtd::forms::panel {
  public:
    panel_right() {
      border_style(xtd::forms::border_style::fixed_3d);
      controls().push_back(label);
      dock(xtd::forms::dock_style::fill);
      size({150, 100});

      label.location({65, 45});
      label.text("0");
    }

    xtd::forms::label label;
  };

  class panel_left : public xtd::forms::panel {
  public:
    panel_left() {
      border_style(xtd::forms::border_style::fixed_3d);
      controls().push_back_range({button_plus, button_minus});
      dock(xtd::forms::dock_style::left);
      size({150, 100});

      button_plus.auto_repeat(true);
      button_plus.location({30, 10});
      button_plus.text("+");
      button_plus.click += [&] {
        count++;
        control& form = parent().value().get();
        panel_right& panel = static_cast<panel_right&>(form.controls()[0].get());
        panel.label.text(xtd::string::format("{}", count));
      };

      button_minus.auto_repeat(true);
      button_minus.location({30, 60});
      button_minus.text("-");
      button_minus.click += [&] {
        count--;
        control& form = parent().value().get();
        panel_right& panel = static_cast<panel_right&>(form.controls()[0].get());
        panel.label.text(xtd::string::format("{}", count));
      };
    }

    xtd::forms::button button_plus;
    xtd::forms::button button_minus;
    int count = 0;
  };

  class communicate : public xtd::forms::form {
  public:
    communicate() {
      controls().push_back_range({panel_right, panel_left});
      padding(10);
      client_size({320, 120});
      text("Controls communicate");
    }

    static auto main() {
      xtd::forms::application::run(communicate());
    }

    panel_left panel_left;
    panel_right panel_right;
  };
}

startup_(tutorial::communicate::main);
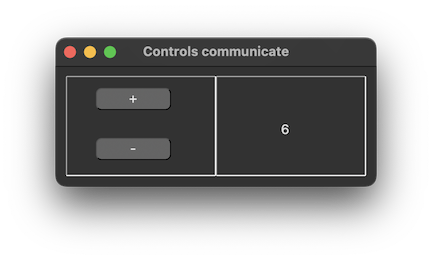
In our example we have two panels. A left and right panel. The left panel has two buttons. The right panel has one label. The buttons change the number displayed in the label. The question is, how do we grab the pointer to the label?
control& form = parent().value().get();
panel_right& panel = static_cast<panel_right&>(form.controls()[0].get());
panel.label.text(xtd::string::format("{}", count));
These two lines are the most important lines of the example. It is shown, how we get access to the label control, which is placed on a different panel. First we get the parent of the both left and right panels. This parent control has a reference to the right panel. And the right panel has a reference to the static text.
In this part of the xtd.forms tutorial, we have created some simple programs.
See also
Figure: Controls communicate